UniFi Controller — eduroam Setup
This guide covers creating an eduroam RADIUS profile and Wi-Fi network on a UniFi Network controller (tested on Network 8.4.x).
Prerequisites
- FreeRADIUS is installed and operational at your institution
- The KENET NRO team has provided you with the shared secret for your RADIUS client
- Your UniFi controller can reach your FreeRADIUS server on UDP
1812(auth) and UDP1813(accounting)
Step 1 — Navigate to the RADIUS Section
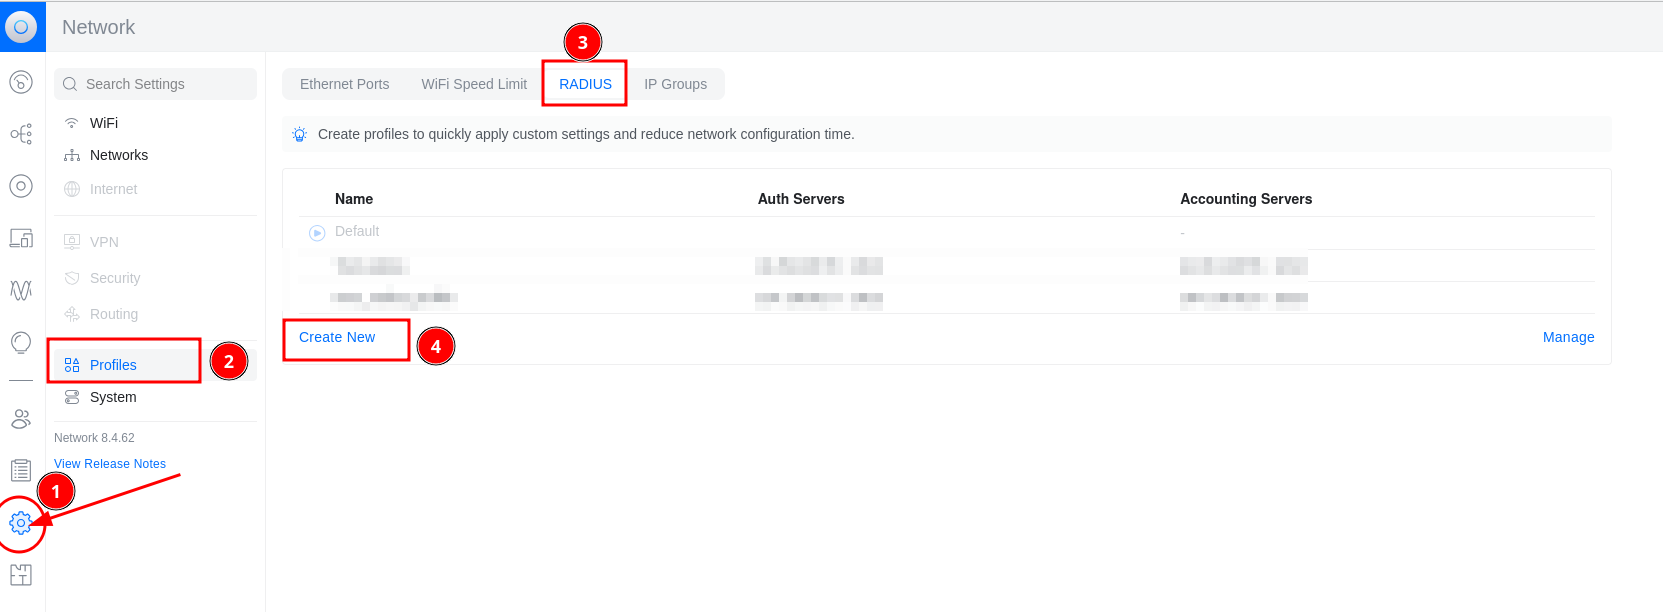
Open the UniFi Network Settings (gear icon, bottom-left of the sidebar):
- Click the Settings gear icon
① - Click Profiles in the left sidebar
② - Click the RADIUS tab at the top
③ - Click Create New
④
Step 2 — Create the eduroam RADIUS Profile
Fill in the new profile form:
| Step | Field | Value |
|---|---|---|
⑤ |
Name | eduroam |
⑥ |
RADIUS Assigned VLAN Support — Wired Networks | Enabled ✓ |
⑦ |
RADIUS Assigned VLAN Support — Wireless Networks | Enabled ✓ |
⑧ |
Authentication Servers | Enter your FreeRADIUS server details |
⑨ |
Authentication Port | 1812 |
⑩ |
Shared Secret | Your RADIUS shared secret (e.g. welcome-kenet) |
⑪ |
Click Add | Adds the auth server to the list |
⑫ |
Accounting | Enabled ✓ |
⑬ |
RADIUS Accounting Server IP | Same FreeRADIUS server IP |
⑭ |
Accounting Port | 1813 |
⑮ |
Accounting Shared Secret | Same shared secret |
⑯ |
Click Add | Adds the accounting server |
⑰ |
Click Apply Changes | Saves the profile |
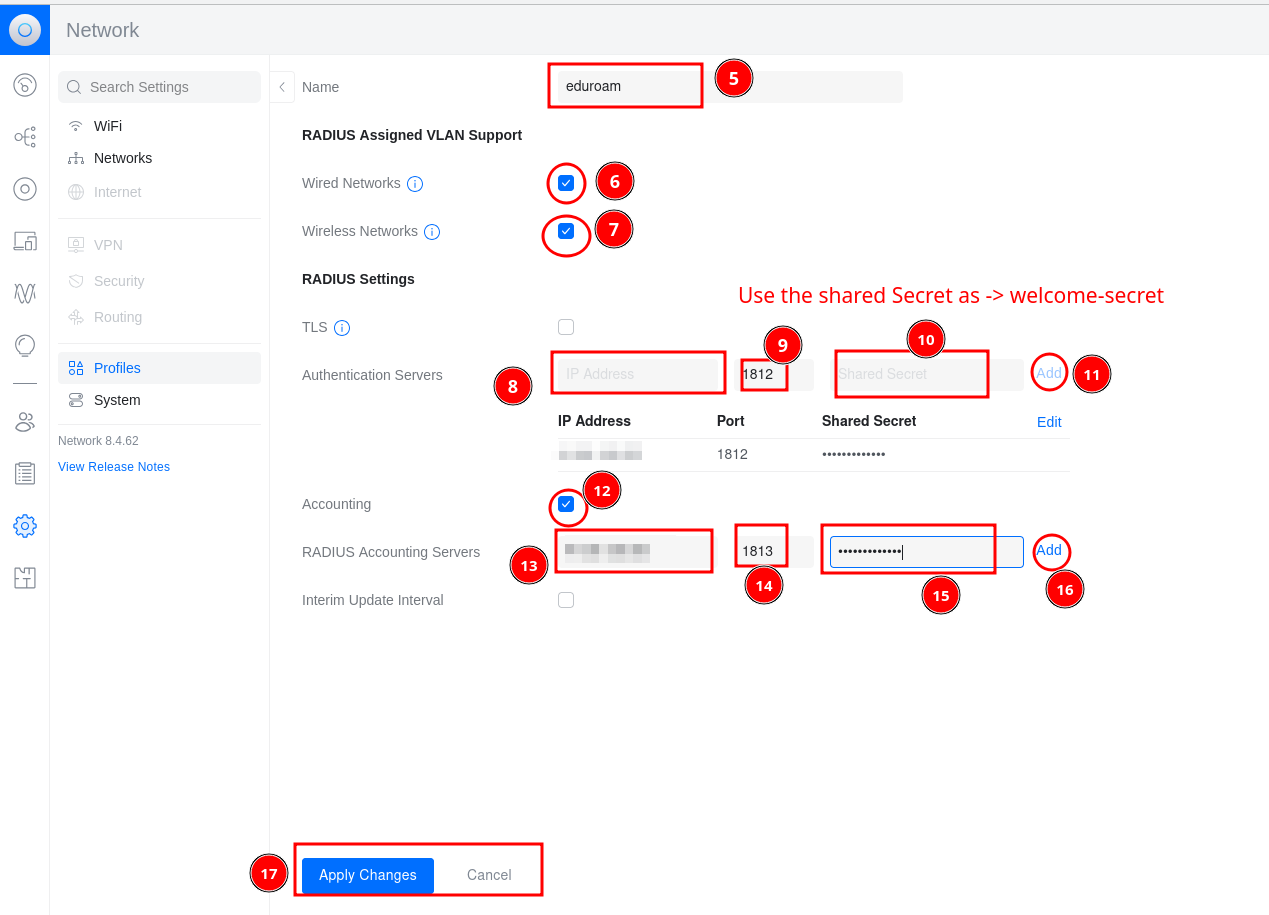
The shared secret must match the
secretconfigured for the UniFi controller in FreeRADIUSclients.conf.
Step 3 — Create the eduroam Wi-Fi Network
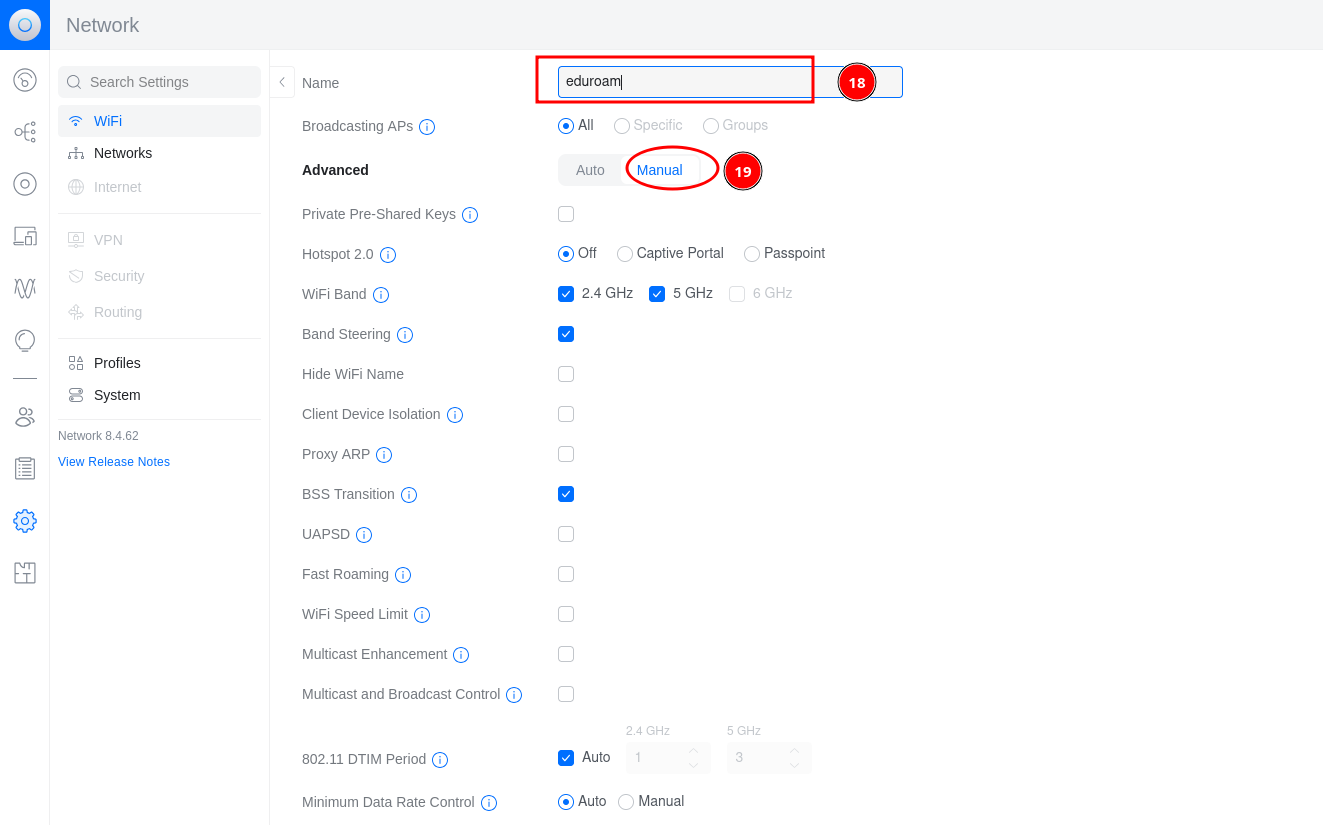
Go to WiFi in the left sidebar and click Create New:
| Step | Field | Value |
|---|---|---|
⑱ |
Name (SSID) | eduroam — must be exactly this |
⑲ |
Advanced | Switch to Manual to reveal all options |
Scroll down to the security settings:
| Step | Field | Value |
|---|---|---|
⑳ |
Security Protocol | WPA2 Enterprise |
㉑ |
RADIUS Profile | Select the eduroam profile created in Step 2 |
㉒ |
Click Apply Changes | Saves the network — SSID starts broadcasting |
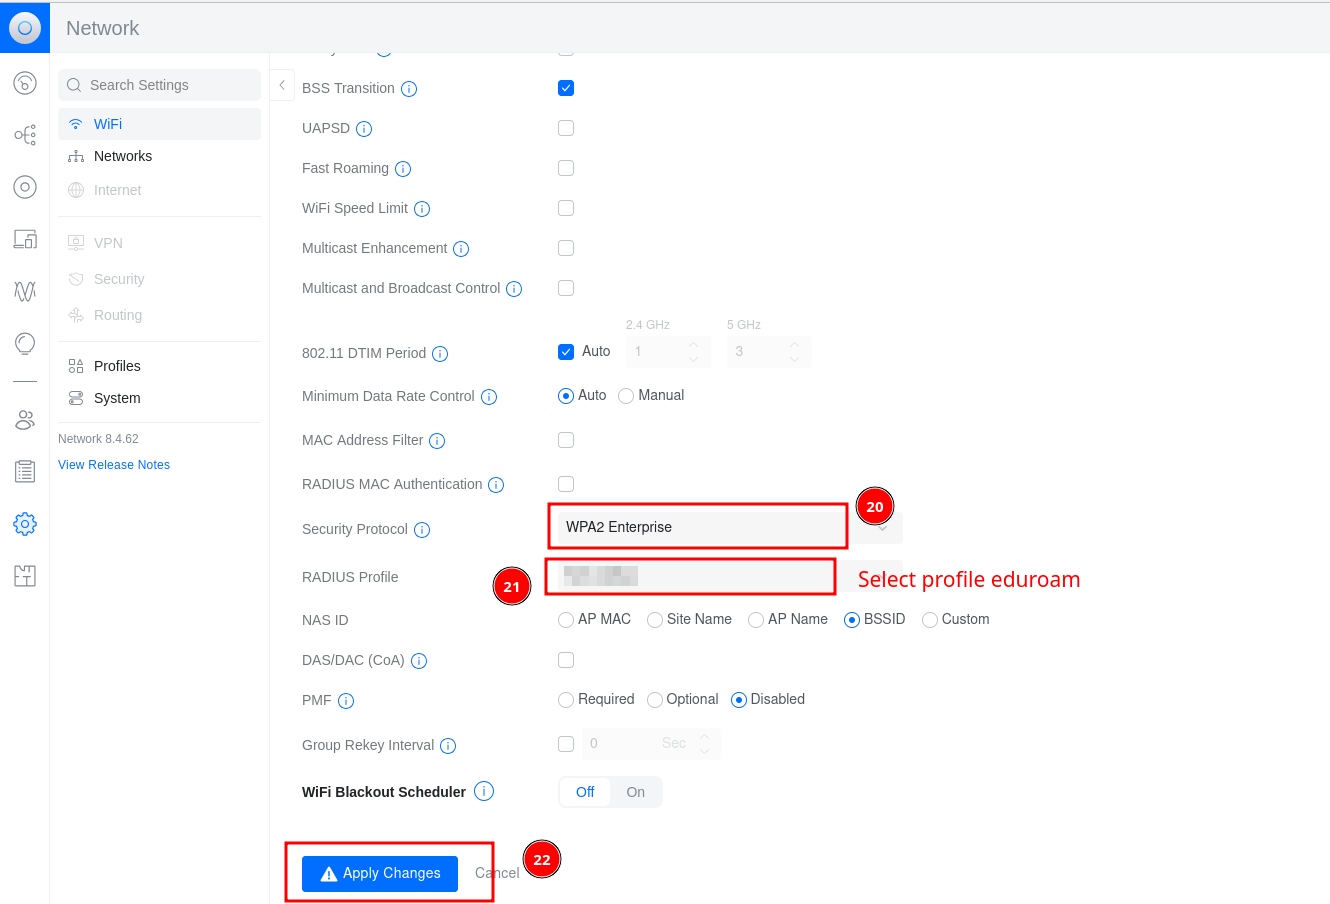
After applying changes, the eduroam SSID will be broadcast on all configured APs.
FreeRADIUS Client Entry
Add the UniFi controller's source IP as a RADIUS client in /etc/freeradius/3.0/clients.conf:
client unifi-controller {
    ipaddr     = <UniFi_controller_IP>
    secret     = <shared_secret>
    shortname  = unifi-eduroam
    nas_type   = other
}
Validate and reload:
Verification
- Connect a test device to the
eduroamSSID - Authenticate with institutional credentials (
user@institution.ac.ke) - Confirm
Access-Acceptin the FreeRADIUS log:
- Confirm the location appears on the eduroam map at eduroam.ac.ke